Mille-Feuille

Mille-Feuille which means a thousand leaves. The traditional mille-feuille is a classic pastry with three layers of puff pastry and two of crème pâtissière (pastry cream). Having said that, there are different flavors that can be used to make this pastry. We made mille-feuille chocolate praline, mille-feuille with raspberries and pistachio mille-feuille.

Before I begin with the details of the above pastries, I would love to share the full-proof way to make pastry cream at home that is creamy, smooth and luscious, full of flavor.

The recipe we use in class is given below. It makes about 1.5 litres of pastry cream.

Milk 1000 g
Eggs 100 g (2-3)
Egg yolks 60 g (2)
Sugar 250 g
All purpose flour 50g
Corn Starch/Custard Powder 50g
Vanilla Bean 1
Butter 100g, softened (optional)

1. Boil the milk with half the sugar and the scraped vanilla bean. Keep whisking continuously so that it does not burn.
2. In a bowl whisk the eggs, yolks and the remaining sugar. Add the custard powder and flour, whisk together.
3. As soon as the milk boils, pour one-third of the milk over the eggs mixture and whisk quickly.
4.Put it back into the milk and heat until it comes to a boil. It is important to keep whisking continuously and quickly the cream so that it does not burn.
5. Once the cream comes to a boil, cook for 1 minute ONLYand remove immediately from heat.
6. If using butter, make sure it is softened, then add gradually to the cream and whisk continuously until smooth.
6. Remove in a bowl, wrap with plastic onto the surface of the cream and chill.

For making different flavors, the flavoring can be added once the cream has been cooked or along with the milk when it is being boiled.

Mille-Feuille Traditionel :

MilleFeuille Traaditional

MilleFeuille Traditional

Makes 6 portions :

Puff Pastry dough 400g
Pastry cream 600g
Rum 20g
Icing sugar, for decorating

Bake the Puff Pastry dough in one thin layer. Cover  with icing sugar and caramelize in oven at 250C.

Flavor the pastry cream with rum before using.

Assembling:
Cut the puff pastry in 3 rectangles. Reserve one rectangle with the caramelized side for the top.
Place one layer of puff pastry on a cake board. Cover with a layer of pastry cream, spread it evenly. Place a layer of puff pastry over it. Cover with another layer of pastry cream and spread evenly. Place the caramelized layer on top and decorate with icing sugar. Cut into 6 portions.

Mille-Feuille aux framboises et l’anis (raspberries and anis) :

Raspberry Mille-Feuille

Raspberry Mille-Feuille

6 portions :

Puff Pastry dough 400g
Pastry cream 400g
Heavy cream 100g
Anise liquor 25 g, optional
Gelatin sheet 2g
Raspberry 250g
Icing sugar, for decorating

Bake the Puff Pastry dough in one thin layer. Cover with icing sugar and caramelize in oven at 250C.

Meuille-Feuille Cream:
Soak the gelatin in cold water for 10 minutes and drain. Beat the whipped cream to stiff peak.
Remove the chilled pastry cream in a mixing bowl and add the gelatin and the anise liquor to it and beat at high speed. Fold in the whipped cream.

Assembling:
Cut the puff pastry in 3 rectangles. Reserve one rectangle with the caramelized side for the top.
Place one layer of puff pastry on a cake board. Cover with a layer of mille-feuille cream, spread it evenly. Arrange raspberries at the edge on all sides. Place a layer of puff pastry over it. Cover with another layer of cream and spread evenly. Repeat with raspberries. Place the caramelized layer on top and decorate with icing sugar and raspberries.

Mille-Feuille Chocolate Praline :

The Meuille-Feuille Chocolate Praline has a lot of elements but it is totally worth the effort.

Makes 1 band 35cm long:

Ingredients:

Chocolate Puff Pastry Dough 450g
Feuilletine praline
Milk chocolate 75g
Hazelnut Paste 47g
Praline 47g
Feuilletine 57g

Chocolate Parfait
Sugar 30g
Water 30g
Egg yolks 30g
Dark chocolate 64% 100g
Whipped cream 200g

Mousseline Praline Cream:
Pastry Cream 250g
Butter 100g
Praline 100g

pastry 2014930 032

Instructions:

Bake the Puff Pastry dough in one thin layer.

Feuilletine praline:
Melt the chocolate at 45C. Add the rest of the ingredients and keep aside.

Chocolate Parfait:
Mix the sugar, water and yolks to 85C. Whisk with a beater till the bowl feels cool to the touch.
Melt chocolate at 55C.
Whisk the cream to soft peaks.
Add the chocolate to the yolk mixture.
Add a little whipped cream to the chocolate mixture and mix with a whisk.
Pour it into the remaining cream and mix well. Pour into a piping bag.

Mousseline Praline Cream:
Beat the chilled pastry cream till it reaches the ribbon stage.
If the praline is too thick, beat with the softened butter until smooth.
Add the pastry cream to the praline butter mixture and mix until smooth.
Pour into a piping bag.

Assembling:
Cut the puff pastry in 3 rectangles.
Place one layer of puff pastry on a cake board. Cover with a layer of Feuilletine praline, spread it evenly.
Pipe small rounds of Mousseline Praline Cream in a straight line to cover the pastry.
Place a layer of puff pastry over it. Cover with another layer of Feuilletine praline and spread evenly.
Pipe small rounds of Chocolate Parfait in a straight line to cover the puff pastry.
Place the third layer on top and decorate.

Bon Apetit!

Bon Apetit!

I am taking these over to Angie’s fun Fiesta Friday for the weekend celebrations! 🙂

2 weeks of Puff Pastry

Puff Pastry..a.k.a FEUILLETAGE in French. What makes a puff pastry flaky, crispy, crunchy, buttery and full of flavor?
Read on to find out the secret to making a really good puff pastry.

There are two parts to making a puff pastry: detempre which is the dough made up of flour, a small portion of butter,salt and water. The dough is not kneaded too much just until it comes together and rested for 30 minutes.
The second part is the rolling out of butter itself. The butter must be slightly softened and rolled into a rectangle with the help of a little bit of flour to be enveloped into the detempre. This is called as beurre manie.

New folder7

The next step is Beurrage, enveloping the butter into the dough, called the Paton. And then Tourrage, which means giving turns. The process for giving turns is same as described in my Khari post. After 6 turns it has 1459 layers!

The exact opposite of this technique involves enveloping the detempre into the butter called as FEUILLETAGE INVERSE.
We also made feuilletage au chocolat and feuilletage pistache where we added cocoa powder and pistachio paste to the Beurre Manie respectively.

The first picture explains how to roll out a dough into a uniform rectangle

The first picture explains how to roll out a dough into a uniform rectangle

What makes puff pastry so crispy, crunchy, flaky, delicious. The Butter, ofcourse! When I used to see pictures of perfectly rolled out butter in recipe books, I often wondered how was it possible? Loh and behold….. I got my answer in the lab!  The professional boulangeries & patisseries  use a different kind of butter with a higher content of butterfat that is more elastic and hence easier to roll without the butter actually melting. Also one must keep in mind the fact that the temperatures in pastry lab is on the lower side.

New folder5

I think I’d prefer to make the inverse feuilletage over the regular one for various reasons. Firstly, the rest time between turns can be reduced for inverse. It shrinks less after baking and it puffs up uniformly as compared to the regular one. Above all, it is definitely more flaky and tasty than the regular one. 🙂

I’ve had a lot of savory things made out of puff pastry and the classic mille-feuille. However, in class we made a variety of sweet things with puff pastry and all were delicious.

We made a pastry called as “Conversation“, which was created at the end of the 18th century. The name comes from a popular book “Les conversations d’Emilie de Madame d’Epinay”. I am totally clueless as to why would you want to name a pastry as Conversation.

It’s a puff pastry dough filled with almond cream and covered with another layer of puff pastry. Cover the top with royal icing and decorate with stripes of puff pastry.

Conversation

Conversation

Another pastry which goes by the name “Pain Complet” also has almond cream enclosed in puff pastry sheets. Make 2 sheets of 2mm thickness. Spread a layer of almond cream, dome shaped. Leave an edge and egg wash it. Cover and seal with the other sheet. Flip it upside down on a baking tray. COver the surface with raw almond paste (almond powder with egg whites), dust with icing sugar and make 6-8 incisions on the top. Bake at 180C.

I guess it gets its name from Pain Complet(whole wheat bread) as it has a striking resemblance to the latter.

I guess it gets its name from Pain Complet(whole wheat bread) as it has a striking resemblance to the latter.

Another one with almond cream was Dartois aux Amandes.

It is supposed to be super straight, by the way!

It is supposed to be super straight, by the way!

We also did a few fruit tarts and the best one was figs as they were in season and we just couldn’t get enough of figs!

Fruit and Puff pastry Tart Bands

Fruit and Puff pastry Tart Bands

We made turnovers, french as well as italian style.

Apple turnovers a.k.a Chaussons aux pommes were made by rolling out dough into fluted rounds of 12 cm diameter. Pipe apple compote and cover the pastry. Flip and place on a baking sheet. Egg wash and score the pastry with different designs.

For the Chaussons Italiens, the same process is followed, except for the fact that the filling is a mix of pastry cream and choux dough. It sounded wierd at first but it was not bad at all.

IMG_7336

IMG_7337

Chaussons au pommes and Pithiviers

Chaussons au pommes and Pithiviers

Pithiviers is again an almond cream filled pastry decorated as an antique galette.
roll out 2 sheets of around 3mm thickness. Place one sheet on a baking tray. Spread in dome shape the almomd cream and cover with the second sheet. Cut small semi circles at the edge of the dough with a cookie cutter. Egg wash and score the top from the centre with a knife. Bake at 220C and then reduce the temperature to 180C.

My favorite were the oh so famous Palmiers.

The puff pastry dough is rolled out by using sugar instead of flour. It is rolled into a rectangle 70 cm by 12 cm, then give 2 double folds. Cut into pieces and place on a baking tray. Bake at 210 for 15-20 mins and flip the sides halfway for the nice caramel color.

106763

Crispy, crunchy, buttery, flaky sweet palmiers

Crispy, crunchy, buttery, flaky sweet palmiers

Next Post : The classic Mille-Feuille and how to make the perfect Crème pâtissière or custard.

Olive Straws

This is almost as good as the real puff pastry! Sometimes, well most of the times it is not possible to make your own puff pastry at home. But if you want to impress your guests at a dinner party with minimum labor and maximum oomph, this recipe surely fits the bill. This quick version of the puff pastry also called as rough puff pastry rises as much as 75% of classic puff pastry and saves a great deal of time.

These olive straws are a fun and easy snack to serve alongside pre-dinner drinks. The crisp, light, flaky and buttery pastry with olives is a great combination. You can use any kind of olives, stuffed olives too if you prefer. I made these when friends were over for brunch and I sure did not have any leftovers. 🙂

DSC_0085

The recipe has been adapted from Michel Roux’s Pastry.

Makes 400 g dough, 12 straws

Ingredients:
200 g plain flour
200 g very cold butter, diced
1 tsp salt
80 ml ice cold water

Olive Straws

Olive Straws

Instructions :

Put the flour in a mound on the work surface and make a well. Out in the butter and salt and work then together with the fingertips of one hand, gradually drawing the flour into the center with the other hand.
IMG_5801
When the dough is grainy, add the iced water gradually until the mixture is incorporated, but don’t overwork the dough. Roll into a ball, wrap and chill for 20 minutes.
IMG_5802
Flour the work surface and roll out the pastry dough into 40*20cm rectangle. Fold it into three. FIRST TURN.
IMG_5811
IMG_5812

Roll the pastry into a rectangle again and fold in three. SECOND TURN.
Wrap the block and chill for 20 minutes or freeze for 5-10 mins.
IMG_5813
IMG_5814
Give the chilled pastry another 2 turns, rolling and folding as before. This makes a total of FOUR TURNS. Wrap and chill for at least 30 minutes before using.

On a lightly floured surface, roll out the pastry into a 32*15 cm rectangle. Using a knife cut into 2 pieces, one 14*15cm and 18*15cm. Place on a baking sheet and chill for 10 minutes.

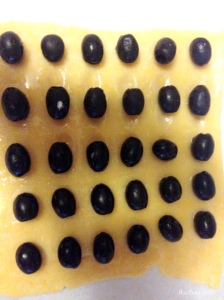
Take the smaller piece and starting 1.5cm away from the edge lay olives end to end in a line. Leave a 2 cm space and make another line of olives. Repeat to make 4-5 more lines. Brush all the exposed pastry with egg wash.
IMG_5821
Cover with the larger piece of pastry and press the whole surface between the olives firmly with your fingertips.
IMG_5824
Chill for 20 minutes.

Preheat the oven to 200°C. With a sharp knife, trim the edges of pastry, then cut it crossway into staws.

Lay the straws on the baking tray and bake for 10-12 minutes. The recipe calls for 5-6 minutes of baking time, mine took longer.

IMG_5826

Best served warm, not too hot.

Bon Apetit!

Bon Apetit!

Veg Puff a.ka Curry Puff

My earliest memory of eating a veg puff was when I was probably 7. Yes, I loved eating puffs as a child. Infact, I loved eating everything that falls under the umbrella of “Street Food”. My mom’s food was the only saving grace for me fortunately. She took great care to ensure we, my younger brother and I had a well balanced nutritious diet.

Veg puffs, Wada Pav, samosas are some of my favorite snacks and I miss them terribly now being so far away from home! As the end of every school year approached, we would wait eagerly for the last day. Simply because our Rickshaw driver (whom we lovingly called  Mama or uncle) would treat us to these goodies and an absolute must ice cream 🙂 I reckon it was his way to show us how proud he was of us…..ah, those were the days!

The love continued when I entered Fergusson college where I spent 5 years, not so much studying, as frequenting different student eateries. The bakery that was most famous for veg puffs in my hometown Pune, was within 5 minutes of walking distance from my college. The popular “Santosh bakery” would make veg puffs only on Thursdays and sold them only for a few hours! Alas, back then these were life’s dilemma. Inadequate supply of my favorite, not so healthy, ultra delicious snacks!

So this time when I made my own puff pastry I knew I had to give these a try! They turned out to be delicious. Indeed, everything tastes better with butter, the more the merrier! It was a hit with my not so Indian-Indian friends as well!

Veg Puffs

Veg Puffs

Ingredients:

Puff Pastry Recipe, please click here

Veggie Filling : Or Any veg filling of your choice

2 tsp Oil
1 Onion, finely chopped
Salt to taste
1/2 cup Carrots, chopped
1/2 cup Green peas –
1/4 tsp Cumin seeds
1 tsp Coriander Powder
1/4 tsp Turmeric powder
1/4 tsp Chaat Masala
1/4 tsp Kasuri methi
1/2 tsp Garam masala powder
Red Chili Powder to taste
Coriander leaves, chopped

Instructions: 

Veggie Filling: 

Heat oil on medium heat in a pan. Add cumin seeds, once they crack add the chopped onions.

Saute till they turn translucent. Add in the ground spices except garam masala powder.
Add in the Veggies and a little salt. Mix well, cover and cook for 7-8 mins. Add the garam masala powder and cook for 30 seconds. Sprinkle over the coriander leaves and give it a stir.

Assembling the Puffs :

Pre-heat the Oven at 210°C.Line a baking tray with parchment paper or sprinkle some flour.

Cut the Pastry sheets strips to form small square/ rectangle. I like mine to be mini bite sized portions.


Put 1 tbsp (approx) of the stuffing in the center.
1
Brush some water over the edges of the pastry. Fold the Pastry Sheet over the other edge and press into the sides and press away.
ae262c4b56181cff47d99f9e6bf2daaaae7ed174bad441dfbbf1911a0da51f79
Put the Puffs on the baking tray and chill for 15 minutes.

Bake for 12-15 minutes until golden. Reduce the temperature to 100°C and bake for another 10-15 minutes. Remove and allow to come to room temperature.

Served with beer for a more grown up version ;)

Served with beer for a more grown up version 😉

Bon Apetit!

Bon Apetit!

Khari, puff pastry from Scratch

Khari, a tea time snack is quite popular in India. My grandmother, my mother all would stock khari as it was a must have for the 4pm tea. 🙂 I wasn’t a tea connoisseur in my younger days, however when tea was served with khari for breakfast or evening tea I was the first to jump on chai-khari!

Khari is puff pastry rolled and cut into different shapes. I have been scared of trying out puff pastry, but all my fears seem futile now as I thoroughly enjoyed the process of making this rich, flaky, crunchy pastry that just melts in your mouth.

This recipe has been adapted from Michel Roux’s Pastry. It has now become my go to recipe for making puff pastry having tried it more than twice now.

DSC_0048

DSC_00581

Makes 1.2 kg dough
Ingredients: I have used half this recipe
500 g flour
400 g butter, very cold
12 g salt
350 ml cold water
24 ml vinegar
50 g butter melted

Instructions:
1. Freeze the butter for about 2 hours or overnight.

2.Put the flour in a mound on a cool work surface and make a well in the middle. Put the salt, wine vinegar, water and melted butter into the well.

Mix the ingredients together with the fingertips of one hand, gradually drawing in the flour with your other hand. Work the mixture with your fingertips to make a dough.
IMG_5837
Push with the palm of your hand 5 or 6 times until it is homogeneous. Roll into a ball, cling wrap and refrigerate for 2 hours.
IMG_5839
3.Take the cold butter, grate it. Sprinkle some flour and shape into a rectangle and chill for 2 hours.

4.Lightly flour the surface, Make a criss cross on the face of the pastry dough with the help of a knife.
Roll the 4 corners out to make 4 large flaps.
IMG_5842
5. Place the butter in the centre of the pastry. Fold the flaps over the butter to enclose it.
IMG_5844
I found it easier to work with the dough after chilling it for 2 hours after this step.

Courtesy : Internet

Courtesy : Internet


SHAPING THE DOUGH:
6.Lightly flour the work surface again. Roll the pastry away from you to make a rectangle. Fold the ends over the middle to make 3 layers. This is the FIRST TURN.

Image Courtesy:Internest

Image Courtesy:Internest

blog3
7.Once more roll the pastry away from you and make a rectangle. Fold into 3 layers again. This is the SECOND TURN.
blog4
Cling wrap and refrigerate for 2 hours or freeze for 20 minutes.

8.Roll out the dough to make a rectangle. Make a book fold. This is the THIRD TURN.
blog5
9.Roll into a rectangle again and make a book fold. This is the FOURTH TURN. Refrigerate for 2 hours or freeze for 20 minutes.

Image Courtesy:Internest

Image Courtesy:Internest

10. Roll out the dough to make a rectangle. Make a book fold. This is the FIFTH TURN.
11. Roll into a rectangle again and make a book fold. This is the SIXTH TURN. Refrigerate for 2 hours or freeze for 20 minutes. Dough is ready to use.

Take half portion of the dough and roll into a rectangle. Cut into desired shapes. Refrigerate for 10 minutes.

Preheat the oven to 210°C. Line a baking tray with baking paper or sprinkle some flour directly over the tray.
IMG_5877
Bake for 15 minutes until golden. Reduce the temperature to 100°C and bake for another 15 minutes. Remove and allow to come to room temperature.
DSC_0051
DSC_00521
Serve with tea!

Bon Apetit!

Bon Apetit!

NOTE: If you intend to freeze the pastry, it is best to do only 4 turns before freezing, and make the final 2 turns after thawing, about 1 hour before using the pastry.