First Two Weeks at Ferrandi

Tarts, Tarts and More Tarts…….

The first month at school was admittedly quite difficult for me. Baking at home is one thing and baking in a professional environment is a completely different ball game altogether. The tools that you use, the quantity in which you make things was a little intimidating at first for me. 🙂 Nevertheless, I was quite excited and it has been a fun, hectic and hard first month for me.

We started off with tarts and it continued for a good two weeks. We were taught the traditional techniques that French use to make the different doughs, line tart rings etc. And I think it would be appropriate to skip the recipes and share with you interesting facts or techniques that I learn at school!

We started with the basic PATE A FONCER (shortcrust dough).We made only the TARTE AUX POMMES(apple pie) with this dough.
The French use the “SABLAGE” technique (taken from the verb Sabler which can be interpreted as Sand-like).
The flour and the fat (butter, chopped) must be rubbed together lightly until the texture is sand-like. If you over work the dough, the butter melts and you get crumbles. This means the dough shrinks while rolling and after being baked.

Chef's Tarte Au Pommes

Chef’s Tarte Au Pommes


The next dough is the PATE SUCRÉE(sweet dough) and we made quite a lot of French classics with this one. The major difference between both the above doughs is the content of sugar. As the sweet dough has more sugar it is more sweet and less elastic than the shortcrust dough. Hence, it is difficult to roll out compared to the shortcrust dough as well.

2 techniques to knead the dough. One, is sablage as explained earlier. The second method is CREMAGE where the butter, sugar and eggs are creamed first and the flour is added thereafter.

Once the dough comes together, the dough needs to be smoothed by the technique called FRASAGE. Form your dough into a log and using a scraper, start to scrape the dough from one in small quantity until all of the dough is smooth. Must be done a maximum of 2 times only.

One the dough is done, it MUST be left in the refrigerator to rest as the gluten gets relaxed and it is easier to roll out the dough.

Technique to Line the TART :
1. roll out the dough and place over the ring.
2. Create a base by pushing the dough in with your thumb.
3. Push in some dough by your thumb at the top to create an edge
4. Crop off the extra dough.
5. Pinch the edges to decorate.

Steps for Lining a Tart ring

Steps for Lining a Tart ring

Apart from the usual apple, lemon, chocolate tarts we also made some different ones like the Tarte Dacquoise, Victoria Tart. The Tart Dacquoise has a baked dacquoise( it is a mixture of meringue and almond flour) base, topped with vanilla cream and topped with tropical fruits. Whereas the Victoria tart has a sweet dough tart base blind baked, filled with sauteed pineapple cubes, topped with pineapple cream frozen disc, decorated with praline cream.

These were my least preferred tarts :

New folder4

The tarts that I loved the most :
Tarte Amandine : Sweet dough tart baked with almond cream, topped with almond flakes.
Tarte Citron : Sweet dough tart with lemon curd and confit lemon slices.
Tarte Bourdaloue : Sweet dough tart baked with almond cream and sliced pears.
Tarte Au Figues : Sweet dough baked with almond cream and sliced figs.

Bon Apetit!

Bon Apetit!

Next Post : Puff Pastry 🙂

Although late, I am still taking these tarts over at Angie’s Fiesta Friday! 🙂

PS: Apologies for the disastrous photos!

A new turn, a new beginning…..

4 weeks….well almost! Since my last post!

There have been some huge changes in my life recently and I’ve been desperate to share it with you all! I’ve missed blogging last few weeks and missed visiting your lovely blogs more-so. As they say, it’s better to be late than never.
So, here I go with filling you in on the latest in my life.

Firstly, I’ve started school again! After 8 years, I am back to school and this time I’m pursuing something I am most passionate about! Pastry! Not just pastry, it gets better, it’s Professional French Patisserie! Secondly, the school I am going to is in Paris, in the heart of the city, and I am going to be here for a year! I cannot begin to tell you how excited I am to be here and pursue my dream in a city of dreams!

A little bit more about my school, I am studying at Ferrandi. It’s a pretty old one, being established in 1920 and a good study environment. We have a huge deal of focus on practical learning making almost 2 desserts each day. Which means I have more than I can even give away! No complaints… 😉

This is going to be quite a short post, but i want to share with you some pictures and experiences. I barely visited places this time around as I was just settling in and also the long hours at school leave little time for the exploring. As I had already visited most of the tourist places last winter, I am going slow on the sight seeing part. 😉 Nevertheless, I’d love to share some of my experiences through pictures.

DSC_0732

DSC_0735

A few from my trip to Deauville, to the north of Paris!

DSC_0787

Coco Chanel's first store!

Coco Chanel’s first store!

I'd never heard of lavendar icecream ever before! I had 2 in a row.. :D

I’d never heard of lavendar icecream ever before! I had 2 in a row.. 😀

How can we not have the Eiffel!

How can we not have the Eiffel!

Did I forget to mention that I’m terrible with french! I have started to learn… i hope to get a hang of it soon enough if not sooner… 😀

On a separate note, we have started with tarts at school and have made quite a few of them now. I’m just getting into my rhythm again and going to post updates from school and Paris quite frequently now. More importantly, going to be visiting your blogs regularly too and love to chat with you all again!

Sorry.. couldn't help but post this one!

Sorry.. couldn’t help but post this one!

PS: Apologies for too many an exclamations here and there, I simply cannot contain my excitement! 😉

Spiced Chocolate Cupcakes with Chocolate Frosting

Sometimes I crave spice and sweet together. If one adds sweetness to spicy food it may go wrong, but the other way round works just like a charm.

Hence, I made these cupcakes with the addition of spices and they tasted absolutely what I was looking for!  I’ve made two kind of frosting here, one with chocolate and the other with cocoa. Both were good but the one with melted chocolate had a richer and smooth texture to it.

Spiced Chocolate Cupcakes

Spiced Chocolate Cupcakes

Ingredients:

Spiced Chocolate Cupcakes:

125 g All purpose flour
1 tsp Baking powder
1 tsp Baking soda
75g Chocolate, chopped
125 g Unsalted Butter
125 g brown sugar
2 eggs
1 tsp Vanilla Extract
Salt, pinch
Coffee, 1 tbsp dissolved in 2 tbsp of hot water
4 tbsp heavy cream

SPICE MIX
1.5 tsp Ground Ginger
1 tsp Ground Cinnamon
Ground Nutmeg, a pinch
Ground Clove, a pinch

DSC_0622

Chocolate Cream Cheese Frosting 1 :

Cream Cheese 125 g, softened
Butter 50 g, softened
Semi sweet chocolate 60 g, chopped
Vanilla Extract 1 tsp
Milk 1-2 tbsp
Icing Sugar 50 g

Chocolate Cream Cheese Frosting 2 :
125 g, Cream Cheese softened
2 tbsp cocoa powder
1 tsp Vanilla Extract
1-2 tbsp Heavy Cream
50 g Icing Sugar

DSC_0672

Instructions:

Cupcakes:

Preheat oven to 180°C. Line muffin tray with cupcake liners.

Sift dry ingredients except sugar together. Set aside.
Melt the chocolate over a double boiler. Once melted, set aside.

Cream butter in a mixing bowl with the help of an electric beater for a few minutes.
Gradually add the sugar and continue to beat until well combined.
Add eggs and beat until mixture is light and fluffy.
Add vanilla extract and coffee. Mix until well combined.
Add flour mixture and continue to beat until well combined.Do not overbeat.
Add cream and mix well.
Using a spatula, fold in the melted chocolate.

Spoon batter into cupcake liners until three-quarters full. Bake for 20 minutes.

When cupcakes are done, remove from the oven and let cupcakes sit in the muffin tray for 5 minutes.
Remove cupcakes from the tray and place on a wire rack to cool completely.

Chocolate Cream Cheese Frosting 1 :

Melt chocolate in a heatproof bowl set over a pan of simmering water, stirring until smooth. Let stand until just warm.
Beat cream cheese, butter and milk until light and fluffy.
Add vanilla essence and mix well with the beater.
Gradually add the icing sugar and beat until mixture is smooth.
Mix in melted chocolate until combined.

Chocolate Cream Cheese Frosting 1

Chocolate Cream Cheese Frosting 1

Using a piping bag pipe the cooled cupcakes or store in the refrigerator until ready to use.

Chocolate Cream Cheese Frosting 2:

Beat the cream cheese, vanilla essence and heavy cream together. Sift icing sugar and cocoa powder over it and beat until well combined.
Using a piping bag pipe the cooled cupcakes or store in the refrigerator until ready to use.

Chocolate Cream Cheese Frosting 2

Chocolate Cream Cheese Frosting 2

DSC_0677

Bon Apetit!

Bon Apetit!

PS: Did you notice that the frosting is definitely way more better at presentation than my previous posts. I followed Marina’s (from City-Cupcakes) advise and got pretty looking swirls. 🙂


Versatile Blogger and Beautiful Blogger Award

Over the last few weeks my blog was nominated for the Versatile Blogger Award by two of my blogger friends. They both have such amazing, delightful blogs that I can spend hours together reading them. 🙂

versatile-award

Here are the rules of the Versatile Blogger Award:

  1. Thank the person who nominated you
  2. Include a link to their blog
  3. Share 7 random things about yourself
  4. Nominate 15 other bloggers who you think deserve the award

Allane from Packing My Suitcase and Ummey from NotBikiniReady nominated me for this award. I am extremely honored and pleased that they would consider this space worthy of recognition. I am grateful to them. 😀

Allane has a beautiful travel blog and I absolutely enjoy her tips and tricks which are quite handy! You will not only learn about places from her blog but something about life as well. 🙂

Ummey’s blog radiates such positive energy that you can’t help but feel cheerful after reading her posts. She usually has something informative to share and I always look forward to reading her posts and she sometimes surprises me with her wonderful recipes. 🙂

Some things about myself: 😉

1. I was always a back-bencher in school and my friends from school have been my best friends for the last 17 years now!. 🙂

2. I love to play squash.

3. I wore my mother’s wedding dress at my own wedding.

4. My all time favorite TV show is FRIENDS, i can watch it again and again. Among the latest ones, I enjoy watching House of Cards.

5. One of my favorite subjects in school was history and I would and still enjoy reading about the Indian Independence and Italian Renaissance era 🙂

6. I used to be a total tomboy until a few years back…………I love shoes and i have over 40 pairs.

7. I  hangout in a small, cozy cafe all by myself sometimes(once a week) and I love it. 🙂

My nominations:

Malar’s Kitchen

YES! I’M VEGAN 🙂

Traditionally Modern Food

Thirsty For Tea

MyFoodTrapestry

CITY-CUPCAKES

CHITRA’S HEALTHY KITCHEN

PRETTY POLYMATH

ViolentsnVanilla

Adorable Life

La Petite Paniere

Spice in the City

apuginthekitchen

flour&spice

Lick+Spoon

Beautiful Blogger Award :

  1. Copy the Beautiful Blogger Award logo.
  2. Thank the person who nominated you and create a link back.
  3. Nominate 7 other bloggers and say a little something about them so that they know why you are giving them this award.

beautiful_blogger_award

A few weeks ago Jhuls from TheNotSoCreativeCook nominated me for the beautiful blogger award. I came across Jhuls recently and simply love her blog and share her love for nutella as well… 😀 She has some amazing range of recipes on her blog and I totally admire her creativity. A big, heartfelt thank you to Jhuls for considering me worthy of this nomination. 🙂

Here are my nominations:

Thirsty For Tea : I love everything about Bonnie’s blog. Her creativity, her write-ups, photography and all her recipes!

YES! I’M VEGAN 🙂 : Charu always introduces me to something amazing. I wouldn’t have heard about Coconut yoghurt if it weren’t for her. 😉

Traditionally Modern Food : Not only is Vidya’s blog a great source of wonderful Indian recipes I am quite ignorant of, but I also sincerely feel that she is an amazingly generous person and I am fortunate to have found a friend in her. 🙂

Malar’s Kitchen : Malar will always have something ingenious up her sleeve and I love to see how she tries to make all the delicious fried stuff into flavorful healthy dishes. Much like Vidya, she’s become a great support as well. 🙂

Spice in the City : I love Naina’s photography and I am in awe of her photos. 🙂

ViolentsnVanilla : I simply can’t get over her amazing cake creations. 😀

MyFoodTrapestry : I love Namrata’s blog as her writing is so much fun and love her photography as well. 🙂

PackingMySuitcase : I love Allane’s write-ups and admire how passionate she is! 🙂

Thank you for bearing with me and hope you all have a lovely week ahead.

PS: No stress to pass on the awards. 🙂


Rose Petal Confit Macarons

Yet another weekend! Yet another party! Yet another macaron presented to you today by yours truly.

I hope you wouldn’t mind me bombarding your parties with macarons so often! If you do, ummmm, hmm…guilty as charged. 😉
I wasn’t planning on making macarons for quite some time now, but I got a request. My ex-boss, an extremely humorous and down to earth fella was visiting and he subtly slipped it into our conversation that I promised him macarons! I so did not! I had a good laugh about it and said I’d think about it.. 😉 He also happened to mention that his favorite were coffee macarons which meant I should definitely experiment with the coffee flavor. So I made some mocha macarons.

DSC_0496

Task accomplished, well almost. I have also been meaning to make rose petal jam macarons for months now. I have tried buying different types of petals and make the jam at home but it simply tastes terrible and quite bitter. We do not usually eat jam and I rarely buy it. So when I was looking for plum butter to use for a cake, my eyes fell upon rose petal confit at the supermarket! I was elated! Super elated friends! 😀

DSC_0598_p

Now, I only had to make the macaron shells and use the ready made filling….. 😉 They turned out to be the best macarons macaron shells I have ever baked. They were the right kind of crunchy and chewy! yay! Usually, the almond meal is made at home by me, however I used the store bought almond meal for these ones, perhaps that could have been the reason? I still don’t know! The only feedback I got on this one was that they were a tad too sweet! Accepted! I need to improvise on them. 🙂

fin


Makes 24-30 depending on the size

Ingredients

For the pâté à macaron :
93 g icing sugar, sifted
93 g ground almonds
1  egg white

For the Italian meringue :
1  egg whites
1 drop lemon juice or 1/8 tsp cream of tartar
93 g caster sugar
1.5 tbsp water

DSC_0541

Instructions :

Heat the oven to 170C/325F/Gas 3 and line two baking trays with baking paper.

Pâté à macaron:
In a large bowl, mix the icing sugar, ground almonds and egg whites to form a paste.

1

Italian meringue :
Whisk the egg whites and lemon juice in a kitchen mixer on a medium speed.
The original recipe calls for using lemon juice, as i was out of lemons i have instead opted to use cream of tartar which works fine too.

Meanwhile, place the sugar and water in a small pan and cook over a high heat until it has reached 117C/242F or the ‘soft ball’ stage.

2

Reduce the speed on the mixer to its lowest setting and pour the sugar syrup from the sides of the bowl onto the firmly whipped egg whites.
Increase the speed to high and continue to whisk for 2 minutes. Now add the food colouring and whisk again until the meringue is colored uniformly, about 1 minute.

2654935791f89362ee0a254ec12e54b527d1f985000732d05f9c03d4c7331c02

Fold the Italian meringue mixture into the pâté à macaron until it reaches the ribbon stage – this is when a spoonful of the mixture poured back into the bowl sits like a ribbon on the surface. Do not over-mix or the macaroon will crack when cooked.

3

Place the mixture in a piping bag fitted with a 8mm/¼in nozzle.

Pipe on 3cm/1in discs on the baking trays, at least 2cm/¾in apart. Tap the tray on a work surface to release any air bubbles. Let the macarons rest for 20-30 minutes before baking.

Bake in the oven for eight minutes.As soon as the macaroons form feet open and shut the oven door to release some steam.
After eight minutes remove from the oven and then leave on a cooling rack until completely cooled.

4

Assembling the Macarons:

Spoon about one teaspoon of the rose petal confit onto the flat side of a cooled macaroon and top with another macaroon to make a sandwich.
Repeat with the remaining macarons and Store in a single layer in an airtight container in the fridge.

DSC_0578_p

I am taking these over to Angie’s Fiesta Friday party and love to see you there! 😀

DSC_0573


Bon Apetit!

Bon Apetit!


Olive Straws

This is almost as good as the real puff pastry! Sometimes, well most of the times it is not possible to make your own puff pastry at home. But if you want to impress your guests at a dinner party with minimum labor and maximum oomph, this recipe surely fits the bill. This quick version of the puff pastry also called as rough puff pastry rises as much as 75% of classic puff pastry and saves a great deal of time.

These olive straws are a fun and easy snack to serve alongside pre-dinner drinks. The crisp, light, flaky and buttery pastry with olives is a great combination. You can use any kind of olives, stuffed olives too if you prefer. I made these when friends were over for brunch and I sure did not have any leftovers. 🙂

DSC_0085

The recipe has been adapted from Michel Roux’s Pastry.

Makes 400 g dough, 12 straws

Ingredients:
200 g plain flour
200 g very cold butter, diced
1 tsp salt
80 ml ice cold water

Olive Straws

Olive Straws

Instructions :

Put the flour in a mound on the work surface and make a well. Out in the butter and salt and work then together with the fingertips of one hand, gradually drawing the flour into the center with the other hand.
IMG_5801
When the dough is grainy, add the iced water gradually until the mixture is incorporated, but don’t overwork the dough. Roll into a ball, wrap and chill for 20 minutes.
IMG_5802
Flour the work surface and roll out the pastry dough into 40*20cm rectangle. Fold it into three. FIRST TURN.
IMG_5811
IMG_5812

Roll the pastry into a rectangle again and fold in three. SECOND TURN.
Wrap the block and chill for 20 minutes or freeze for 5-10 mins.
IMG_5813
IMG_5814
Give the chilled pastry another 2 turns, rolling and folding as before. This makes a total of FOUR TURNS. Wrap and chill for at least 30 minutes before using.

On a lightly floured surface, roll out the pastry into a 32*15 cm rectangle. Using a knife cut into 2 pieces, one 14*15cm and 18*15cm. Place on a baking sheet and chill for 10 minutes.

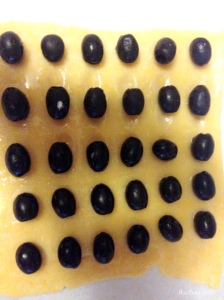
Take the smaller piece and starting 1.5cm away from the edge lay olives end to end in a line. Leave a 2 cm space and make another line of olives. Repeat to make 4-5 more lines. Brush all the exposed pastry with egg wash.
IMG_5821
Cover with the larger piece of pastry and press the whole surface between the olives firmly with your fingertips.
IMG_5824
Chill for 20 minutes.

Preheat the oven to 200°C. With a sharp knife, trim the edges of pastry, then cut it crossway into staws.

Lay the straws on the baking tray and bake for 10-12 minutes. The recipe calls for 5-6 minutes of baking time, mine took longer.

IMG_5826

Best served warm, not too hot.

Bon Apetit!

Bon Apetit!

White Chocolate Raspberry Muffins

Berries are so cheap these days that I bought quite a lot of them… 😀

If you have watched Donna Hay’s show you will know that most of her recipes are infact quite fast, fresh and simple. I’ve given a try at her raspberry white chocolate muffins and they are a treat indeed!

The sweetness from the white chocolate and the tartness of the raspberries create an amazing flavor.

DSC_09331

Ingredients: I used half of the recipe

2 cups (300g) all-purpose flour
2 tsp baking powder
¾ cup (165g) caster sugar
1 cup (240g) sour cream
2 eggs
1 tsp finely grated lemon rind
⅓ cup (80ml) vegetable oil
1½ cups (225g) frozen raspberries
1 cup (175g) chopped white chocolate

Instructions:

Preheat oven to 180ºC (355ºF). Lightly grease the muffin tins or line it with paper liners.

Sift the flour and baking powder into a bowl. Add the sugar and stir to combine.
In a separate bowl, combine the sour cream, eggs, lemon rind and oil and whisk together.
Make a well in the center of the dry ingredients and pour the wet ingredients over and mix well until combined.Do not over mix.
Carefully fold in the raspberries and chocolate and spoon into the lined moulds.

Fill the muffin cups about 2/3rd full.

Bake for 40 minutes or until cooked when tested with a skewer. It took me 25 minutes.

Donna Hay's White Choc Raspberry Muffins

Donna Hay’s White Choc Raspberry Muffins

Bon Apetit!

Bon Apetit!

Masala Chai Macarons

06:00 hours. 15th August, 1994
“Sonu, Monu wake up”. (That was and still is our nickname at home 😉 ) “Wake up kids, the parade is going to start soon!” This was the same routine every year where our dad with a child’s enthusiasm would wake us early morning on a holiday to watch the Independence Day parade.

68th Independence Day Parade. Pic Courtesy: NDTV

68th Independence Day Parade.
Pic Courtesy: NDTV

I remember being in awe as I would see members of the Indian Armed Forces marching in perfect rhythm. The TV Channels would screen patriotic movies and those were happy times. We would be treated to some amazing food and of course, desserts. How can a celebration be complete without sweets, may I ask?

A Ladakhi in a traditional attire performs during a full dress rehearsal for Independence Day celebrations in Srinagar.  Photo Courtesy: Nissar Ahmad, The Hindu

A Ladakhi in a traditional attire performs during a full dress rehearsal for Independence Day celebrations in Srinagar.
Photo Courtesy: Nissar Ahmad, The Hindu

Balloons in the colour of Inda's National Flag - Tiranga (Tricolour)fill the sky in front of the Red Fort in Delhi.  Photo Courtesy : Ndtv.com

Balloons in the colour of Inda’s National Flag – Tiranga (Tricolour)fill the sky in front of the Red Fort in Delhi.
Photo Courtesy : Ndtv.com

Unlike the rest of my family, I am not a tea-drinker. It is the welcome drink in many households and sometimes the hosts might get offended if you refuse to have tea. 🙂 I’ve had my share of tea rather unwilling many a times with the exception of masala chai.

Image Courtesy: Shikha Nambiar http://yellowturquoise.blogspot.in/

Image Courtesy: Shikha Nambiar
http://yellowturquoise.blogspot.in/

I thoroughly enjoy a good cup of masala chai and there’s a certain je ne sais quoi about the spicy tea that leaves my palate mesmerized.
In my endeavor to create something sweet that is inspired heavily from Indian flavors, I’d love to share with you my Masala Chai Macarons.

DSC_0491

DSC_0505
Ingredients :

For the pâté à macaron :
93 g icing sugar, sifted
93 g ground almonds
1 medium free-range egg white
1 tsp Masala Chai Mix (Black Pepper,Dry Ginger,Cassia,Cardamom,Nutmeg,Clove,Black Cardamom)

For the Italian meringue :
1 medium free-range egg white
1 drop lemon juice or 1/8 tsp cream of tartar
93 g caster sugar
1.5 tbsp water
Ivory Food coloring (optional)

Tea Infused Chocolate Ganache :
100ml whipping cream
2 teabags, black tea
100g dark chocolate,  finely chopped (or white chocolate if you wish)

Instructions:

Heat the oven to 170C/325F/Gas 3 and line two baking trays with baking paper.

Pâté à macaron:
In a large bowl, mix the icing sugar, ground almonds, masala chai mix and egg whites to form a paste.

Italian meringue :
Whisk the egg whites and cream of tartar(or lemon juice) in a kitchen mixer on a medium speed.

Meanwhile, place the sugar and water in a small pan and cook over a high heat until it has reached 117C/242F or the ‘soft ball’ stage. I do not own a thermometer so I just tell when the bubbles are almost the same size, that’s the stage we are looking to achieve here.

Reduce the speed on the mixer to its lowest setting and pour the sugar syrup from the sides of the bowl onto the firmly whipped egg whites. Increase the speed to high and continue to whisk for 1 minute.
Now add the food colouring and whisk again until the meringue is colored uniformly.

Fold the Italian meringue mixture into the pâté à macaron until it reaches the ribbon stage – this is when a spoonful of the mixture poured back into the bowl sits like a ribbon on the surface. Do not over-mix or the macaroon will crack when cooked.

Place the mixture in a piping bag fitted with a 8mm/¼in nozzle.

Pipe on 3cm/1in discs on the baking trays, at least 2cm/¾in apart. Tap the tray on a work surface to release any air bubbles. Let the macarons rest for 20-30 minutes before baking.

Bake in the oven for eight minutes.As soon as the macaroons form feet open and shut the oven door to release some steam.
After eight minutes remove from the oven and then leave on a cooling rack until completely cold.

Tea infused Chocolate Ganache:
Place the cream in a small pan and bring to a boil. Remove from heat and add in the tea bags. Rinse the tea bags into the cream quickly so as the cream doesn’t cool down.
Remove the tea bag and strain the cream over the chocolate and whisk in the chocolate until the mixture is smooth.

Spoon about one teaspoon of ganache onto the flat side of a cooled macaroon and top with another macaroon to make a sandwich.
Repeat with the remaining ganache and macaroons and store in a single layer in an airtight container in the fridge.

Masala Chai Macarons

Masala Chai Macarons

We all enjoyed these macarons and I had some friends fighting over these. Well, you are allowed to unleash the child within you on special occasions. 🙂

Bon Apetit!

Bon Apetit!

I will be taking these over to Angie’s Fiesta Friday for the celebrations!

Happy Independence Day!

Happy Independence Day!